
Returns and refunds / Returns and refunds
Receive a return order (Admin and Staff)
Receive a return order from an administrator account.
1. Go to the Returns Section
In the left-hand sidebar, click on “Returns” (Returns).
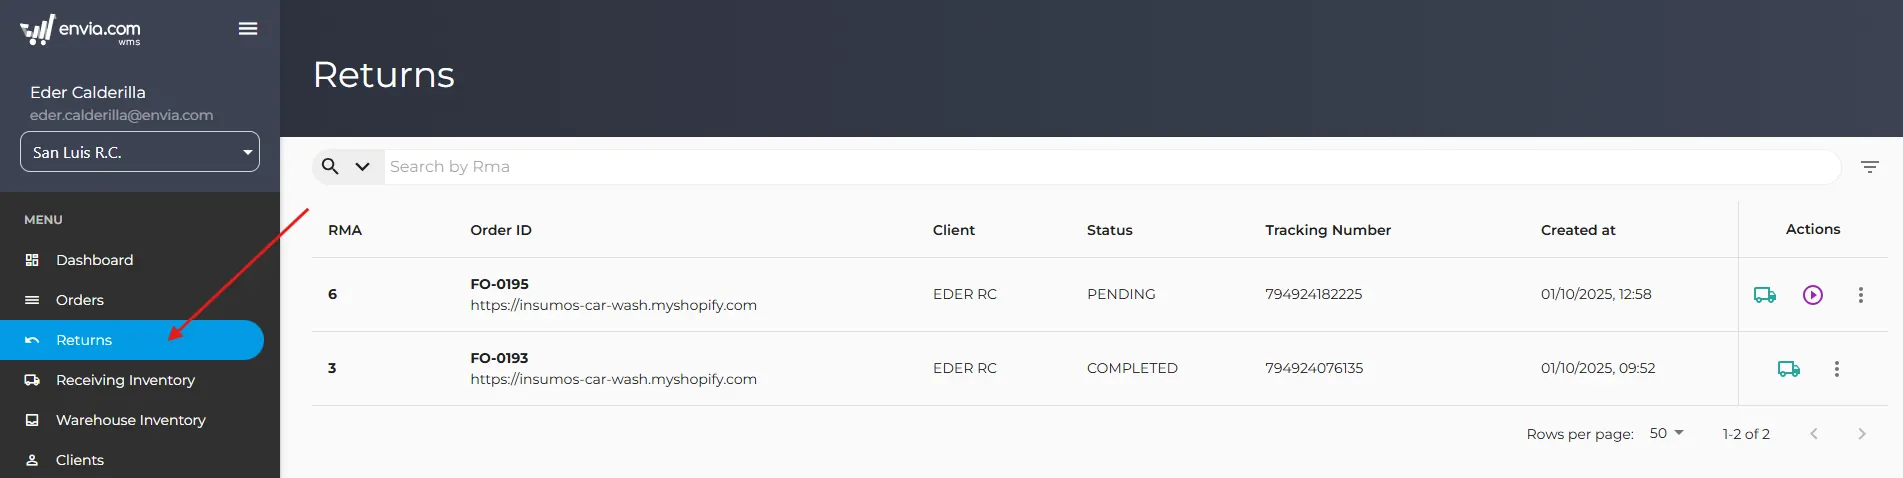
This will take you to the home page of “Returns“, where you’ll see a list of all existing return orders.
- Identify the Pending Return Order
- Locate the return order you want to process. In the table, you can identify it by:
- RMA: The return ID number.
- Order ID: The ID of the original order.
- Client: The name of the customer who made the return.
- Status: The current status of the return. Look for those with a status of “PENDING.”.
- Tracking Number: The package tracking number.
- Search field Next to this field, there is a drop-down menu (indicated by a down arrow). Click this menu to select the desired search parameter. The available options are:
- Rma: Search by return ID number.
- Order ID: Search by a specific order ID.
- Order ID: Search by the original customer order ID.
- Tracking Number: Search by the return package tracking number.
- Locate the return order you want to process. In the table, you can identify it by:
3. Begin the Receiving Process
Once you have identified the return order with the status “PENDING” that you want to process, there are two ways to start the receipt process:
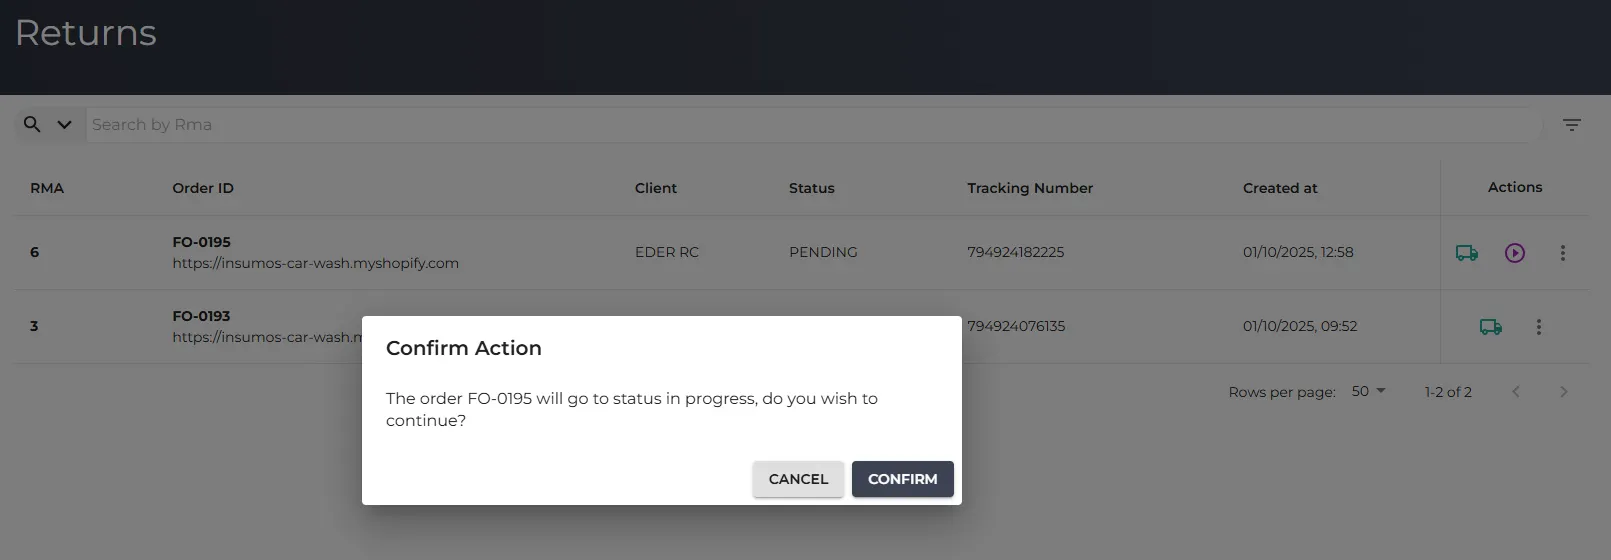
Option A: Start from the play icon.

Option B: Start from the “More Options” menu”

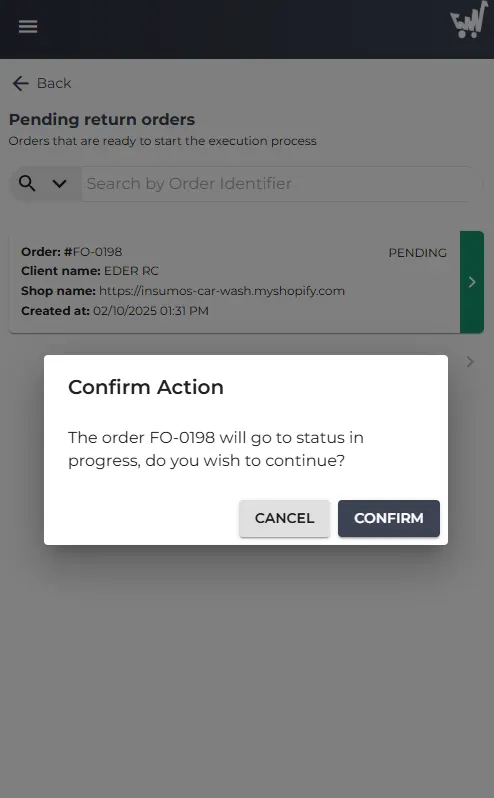
When you click the button to process the order, a confirmation modal opens.
4. Process the Receipt and Placement of Products
Once you've started the return process (either via the shortcut icon or the options menu), you'll be taken to the “Receive Return” screen.

- Verify the Order At the top, you can see the Order: #FO-0195 to confirm that you are working with the correct return.
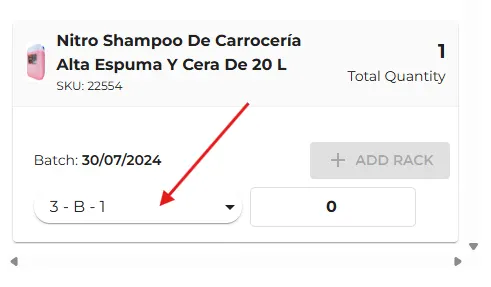
- Selecting the rack or racks: Select where the products will be placed. By default, the location from which the product was taken is preselected.

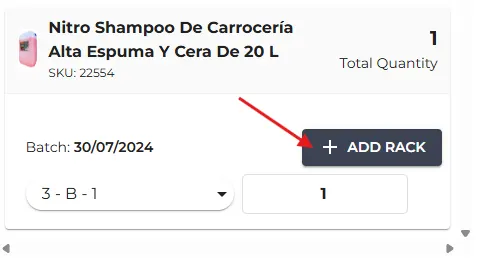
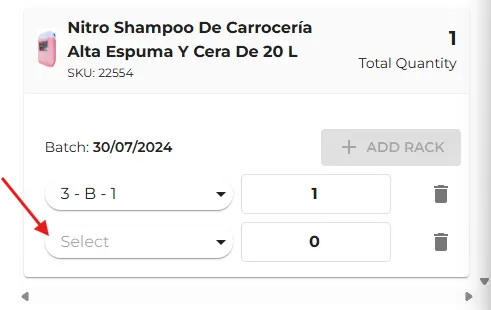
- Place the product in two different locations: You can add the product to more than one location.

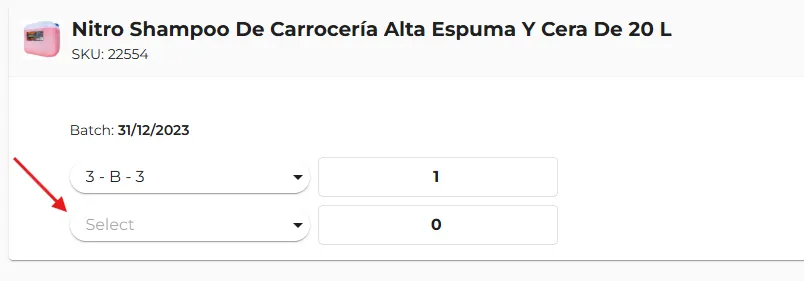
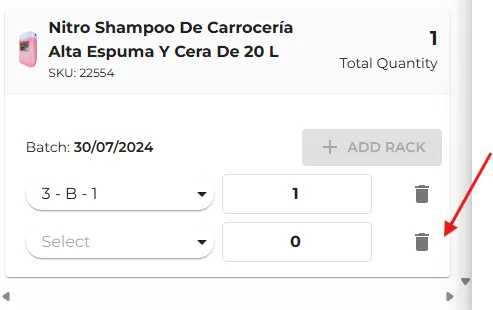
- Delete a location If you accidentally add an incorrect rack location or no longer need one of the assignments, you can delete it.
For each row containing a rack assignment and quantity, you'll see an icon recycling bin (a trash can) on the far right. Click this icon to delete that specific rack assignment row.

- Add Evidence (optional) It allows you to add images of the products you've received. Click the “+ADD” to upload photos of the products, which is useful in case of any future disputes or audits regarding the condition in which they were received.

- Complete the Check-in:
Once you have verified all the products, added the necessary documentation, and assigned each item to its corresponding rack location with the exact quantity, click the “COMPLETE” button at the bottom of the screen.
How do I receive a return order from a staff account?
1. Go to the Returns Section
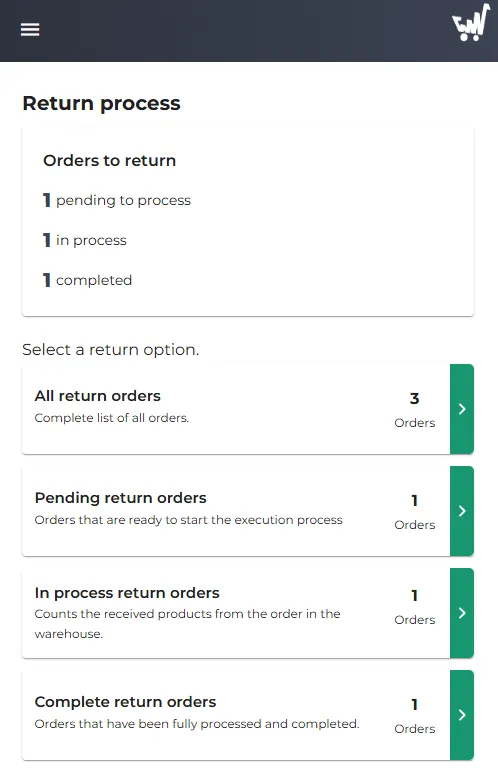
In the left-hand sidebar, click “Return Process.”.
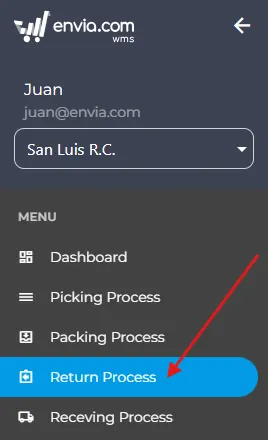
- Select a return option: The following sections allow you to filter and manage returns based on their status:
- All return orders: Displays a complete list of all return requests, regardless of their status.
- Pending return orders: Orders that are ready to begin the fulfillment process. These are requests recently submitted by the customer that require an initial action.
- Return orders in process: Count the products received from the order in the warehouse. These orders are active and require monitoring until they are completed.
2. Management of Pending Return Orders
This section is used to review and begin processing return requests that have been initiated by customers but have not yet been approved or for which the products have not yet been received.
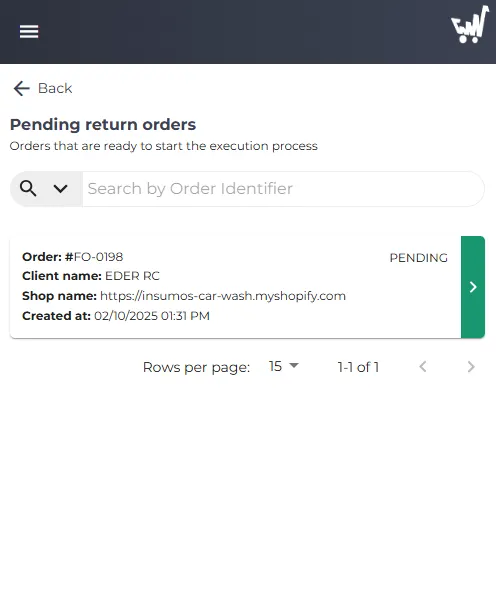
- Order Identification: Visible information:
- Order: #FO-0198: The unique identification number of the return order.
- Client name: EDER RC: Name of the customer who requested the return.
- Store name: The store where the original order was placed.
- Created on: October 2, 2025, at 1:31 PM: The date and time the refund request was created.
- PENDING: Current order status.
- Search field Next to this field, there is a drop-down menu (indicated by a down arrow). Click this menu to select the desired search parameter. The available options are:
- Order ID: Search by a specific order ID.
- Order ID: Search by the original customer order ID.
- Tracking Number: Search by the return package tracking number.
- Each card represents a pending return order.
3. Begin the Receiving Process
Once you have identified the return order with the status “PENDING” that you want to process, there are two ways to start the receipt process:
4. Process the Receipt and Placement of Products
Once you've started the download process (either via the shortcut icon or the options menu), you'll be taken to the screen “Receive return” (Receive a refund).
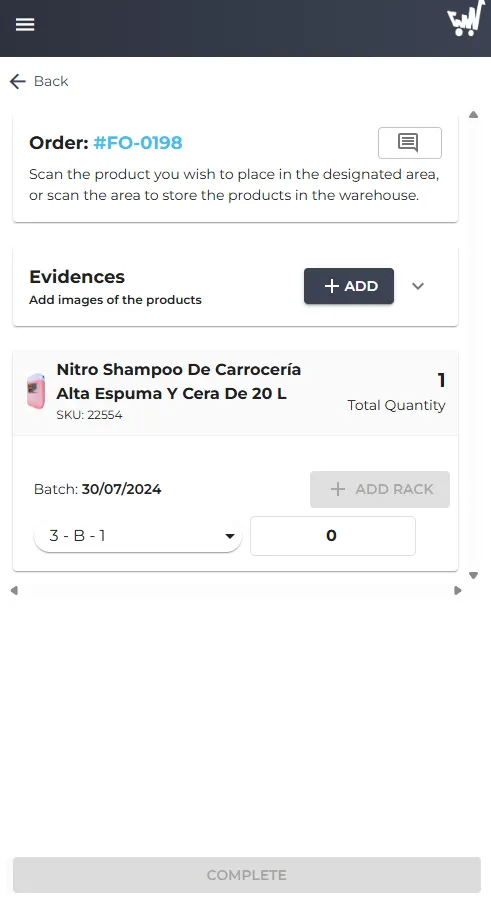
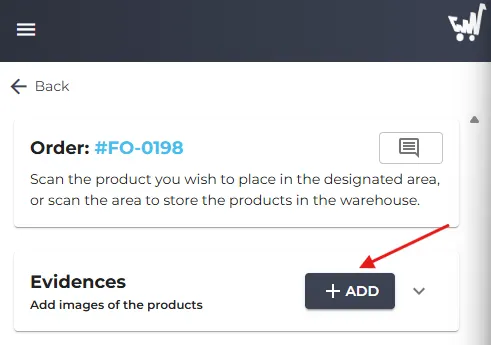
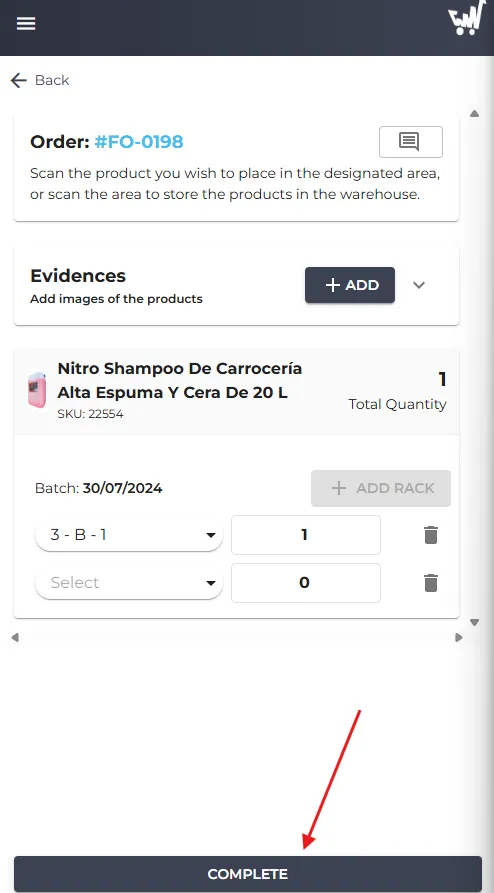
- Verify the Order At the top, you can see the Order identifier (Order: #FO-0198) to confirm that you are working with the correct return.
- Selecting the rack or racks: Select where the products will be placed. By default, the location from which the product was taken is preselected.
Place the product in two different locations: You can add the product to more than one location.
- Delete a location If you accidentally add an incorrect rack location or no longer need one of the assignments, you can delete it. For each rack assignment and quantity line, you'll find an icon recycling bin (a trash can) on the far right. Click this icon to delete that specific rack assignment row.
- Add Evidence (optional) It allows you to add images of the products you've received. Click the “+ADD” to upload photos of the products, which is useful in case of any future disputes or audits regarding the condition in which they were received.
- Complete the Check-in:
- Once you have verified all the products, added the necessary documentation, and assigned each item to its corresponding rack location with the exact quantity, click the button “COMPLETE” at the bottom of the screen.
Was this resource helpful to you?