
Returns and refunds / Returns and refunds
Creation of return orders
The returns creation module allows you to generate new return orders from previously completed orders. This makes it easy to register returned products, reinstate them in inventory or manage replacements for the customer.
The functionality has two interfaces adapted according to the type of user:
- Administrator (Admin): Desktop view with complete table of orders.
- Warehouse Personnel (Staff)Mobile-optimized view with support for barcode scanning.
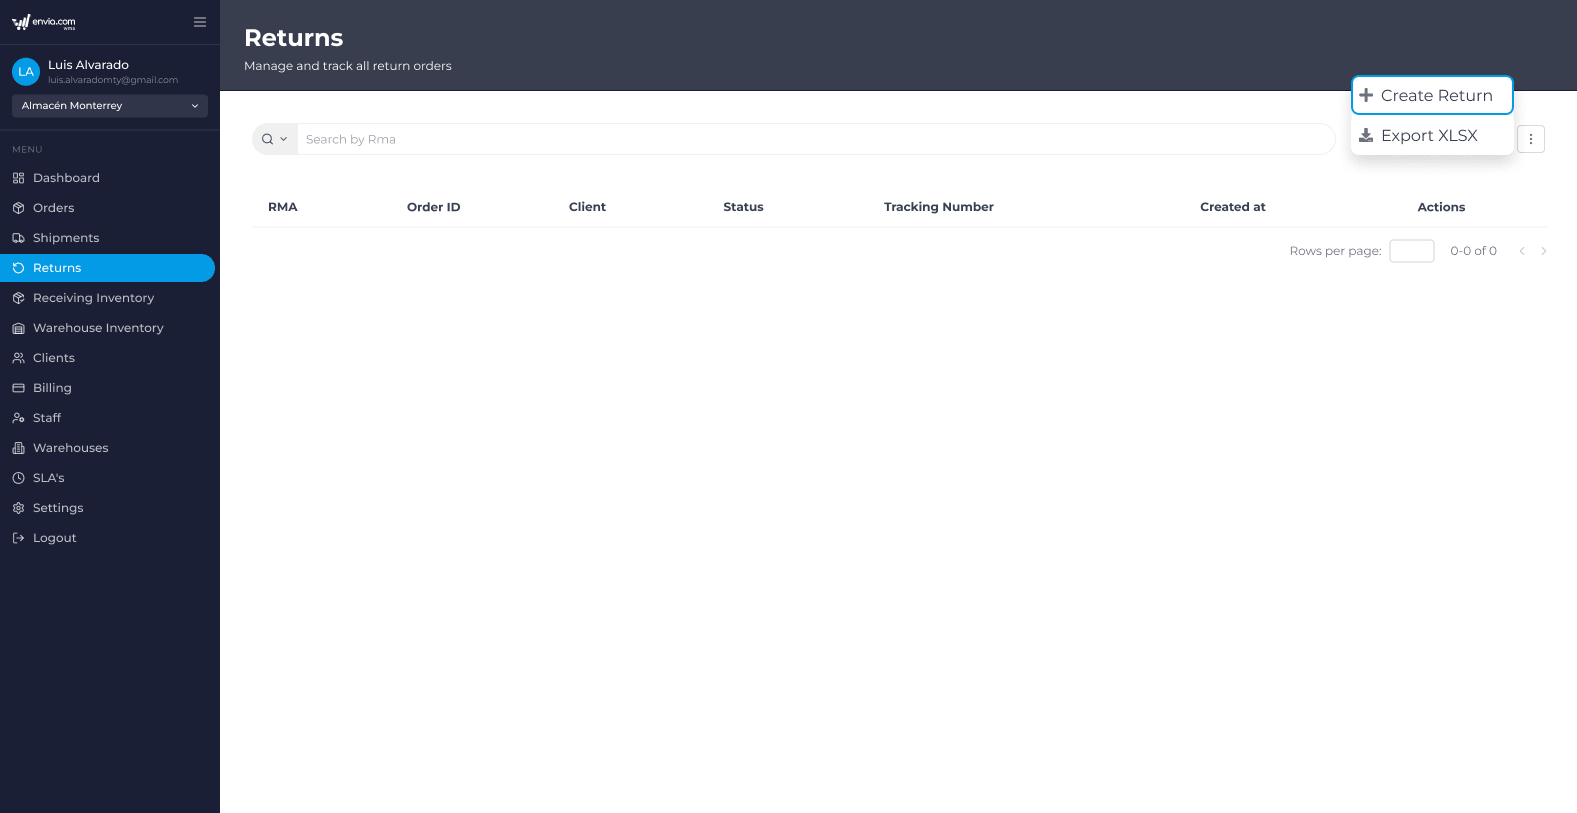
How to access the module
From the Administrator view
- Go to the section Returns from the main menu
- Click on the actions menu and select the option Create return
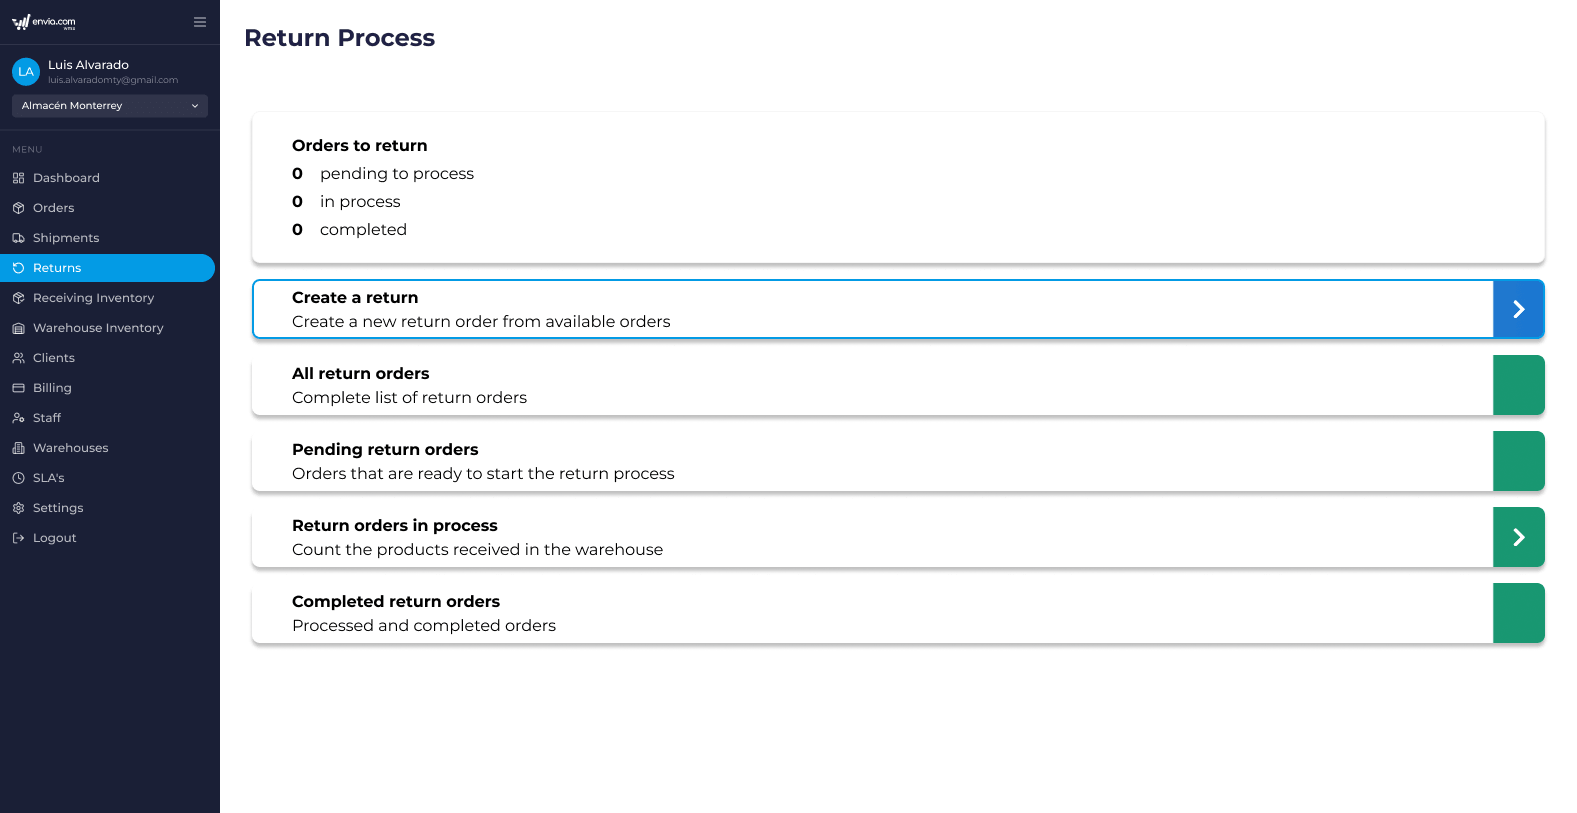
From the Staff view
- Go to the section Returns Process
- Select Create Returns
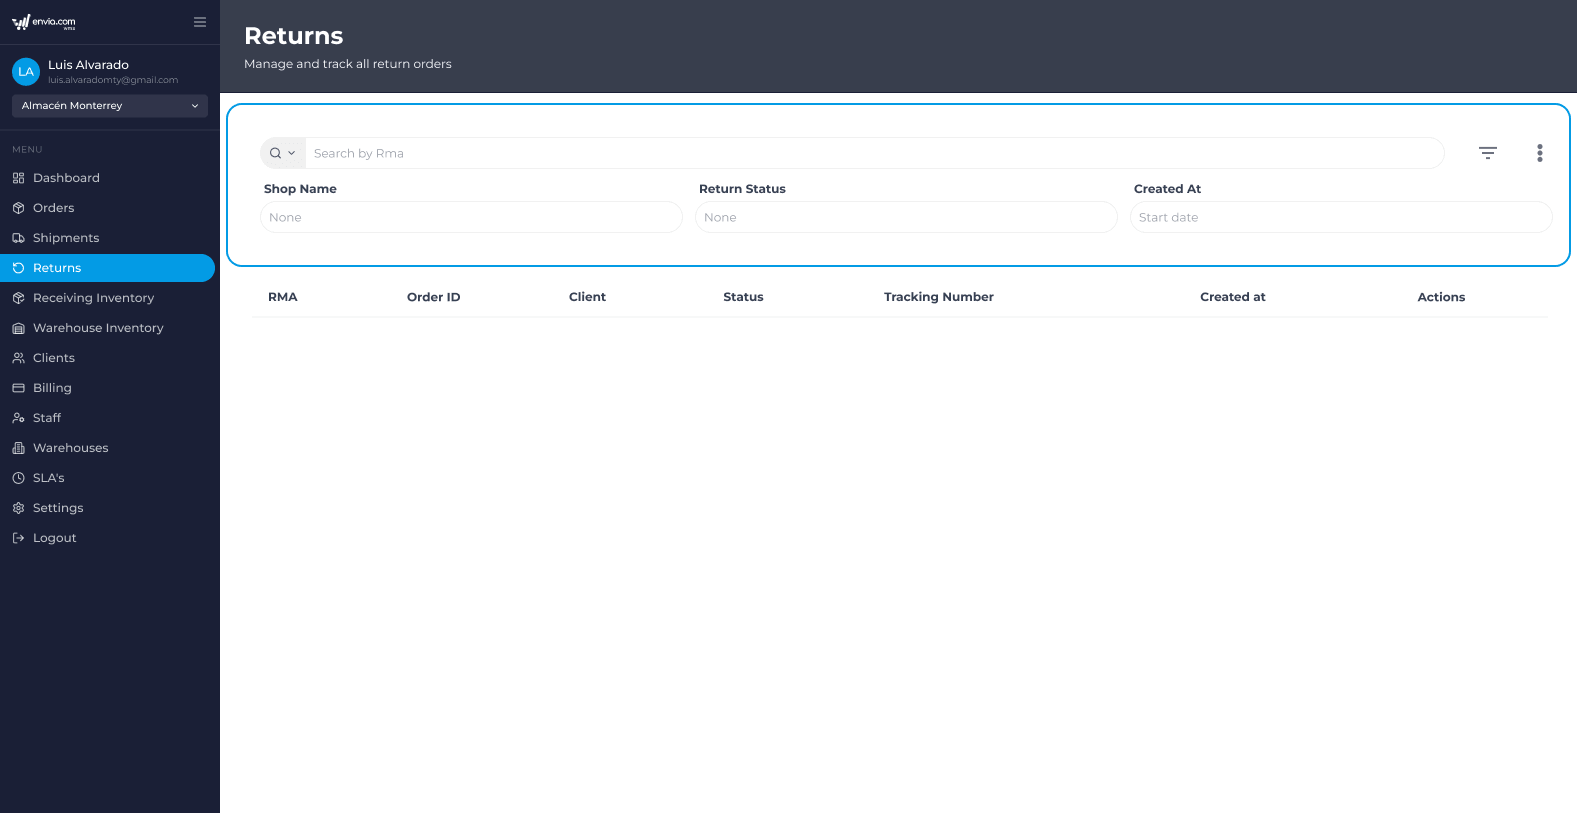
Search and filter orders
Before creating a return, you must first find the corresponding order.
Search bar
Both in Admin as in Staff, If you are using the search bar, you can use the search bar to locate orders using the following fields:
| Field | Description |
|---|---|
| Tracking number | Shipment tracking number (default) |
| Customer | Client's name |
| Store name | Store associated with the order |
| Order ID | Internal order identifier |
| Identifier | Visible order identifier |
Advanced filters
To apply additional filters:
- Click on the filter icon.
- Select one or more criteria.
Available options:
- Filters by category: Customer and Store
- Date range: Filter by date received (Received At)
- Return statusReturn status
Barcode scanning (Staff View)
The view from Staff allows orders to be found quickly by scanning.
- Hardware scannerWhen scanning a code with a physical reader, the system will automatically search for the order using the tracking number.
- Device cameraPress the button Scan tracking number to activate the camera and scan barcodes.
ℹ️ If the system finds a valid order, the return creation mode will open automatically..
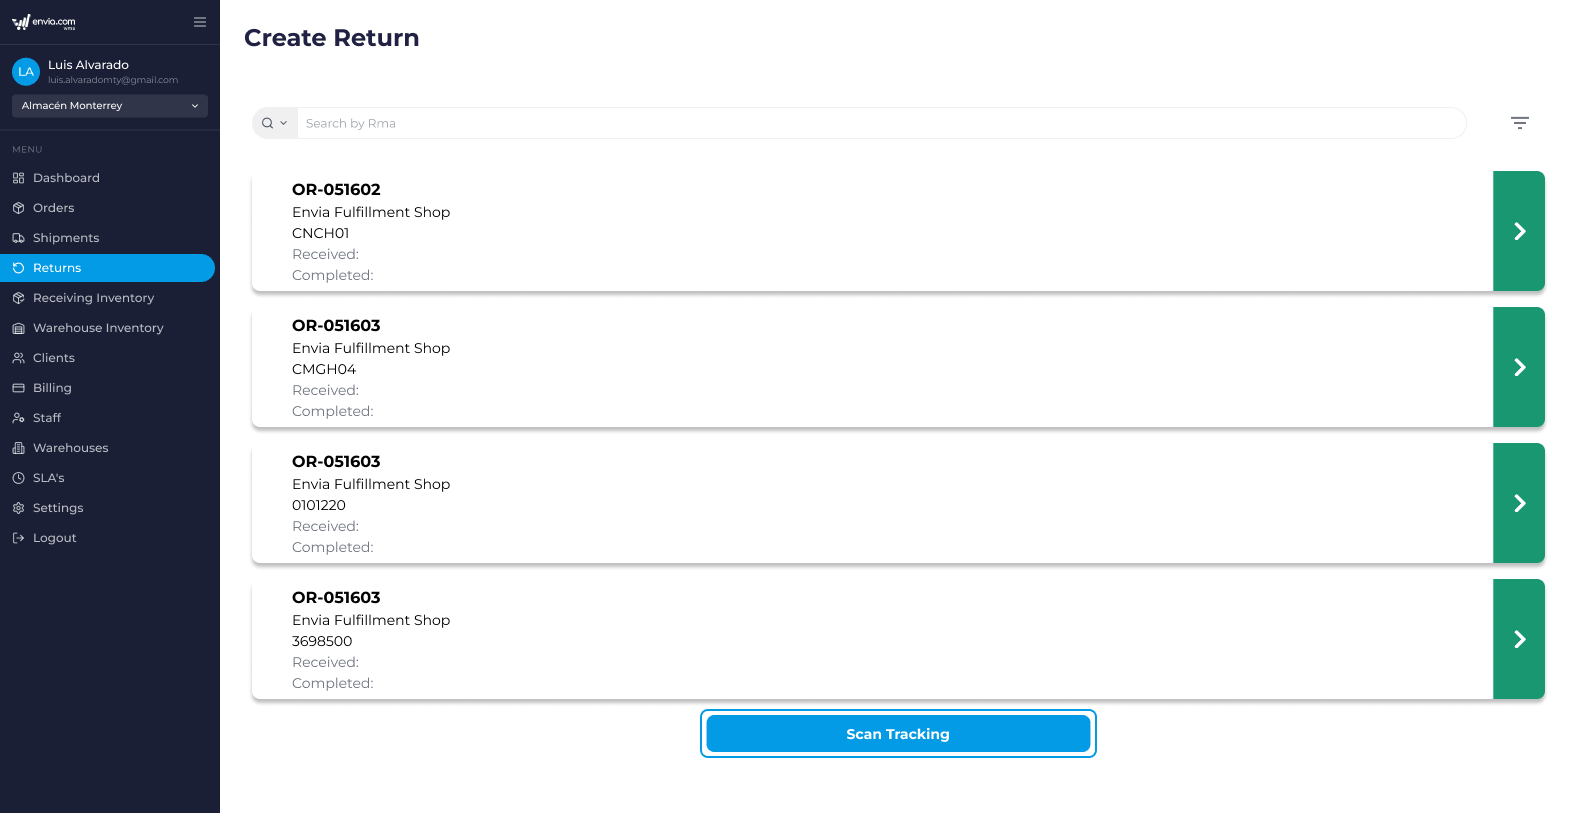
Information displayed in order
Admin View (Table)
| Column | Description |
|---|---|
| Order ID & Store | Order identifier and store name |
| Products | Quantity of products (Q), Total volume (V), Total weight (W) |
| Customer | Customer's name and address (State, Country, Postal Code) |
| Parcel | Carrier logo used |
| Dates | Dates received, created and completed |
| Shares | Button to start the return process |

Staff View (Cards)
Each order is shown as a card that includes:
- Order identifier
- Store name
- Quantity of products
- Carrier logo
- Client's name
- Location (State, Country, Zip Code)
- Date of receipt
- Date completed (if applicable)
Process for creating a return
Selecting an order will open a modal with a guided three-step process.
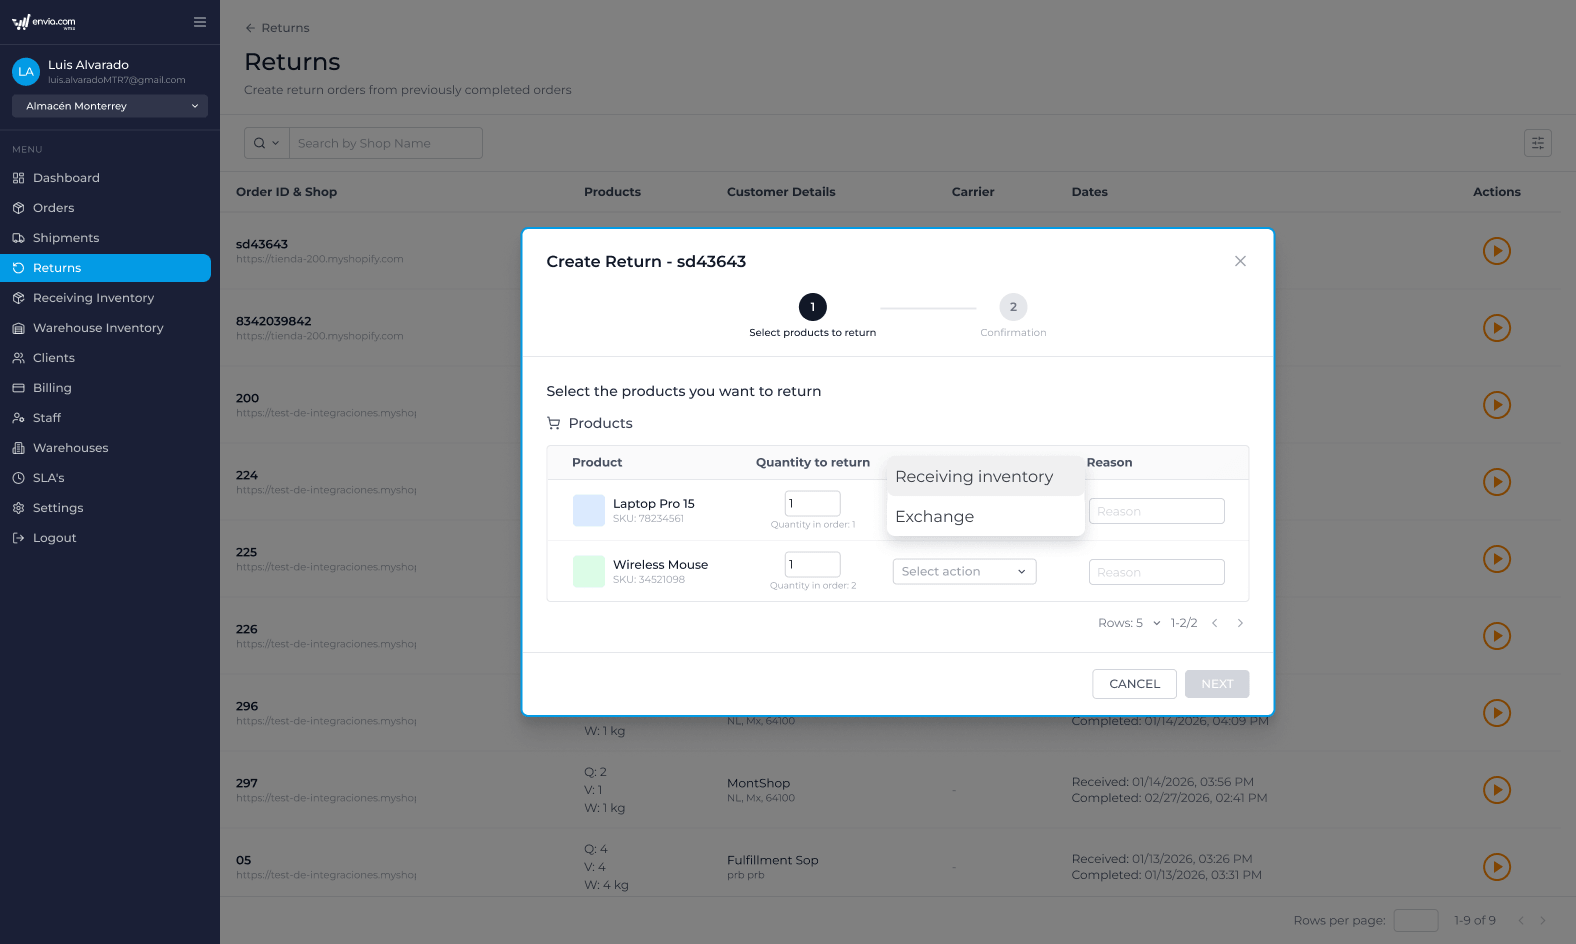
Step 1: Select products to return
In this step all products included in the original order are displayed.
Information displayed by product by Product
| Field | Description |
|---|---|
| Image | Product photo |
| Name | Product name |
| SKU | Reference code |
| Lot | Batch identifier (if applicable) |
| Quantity available | Maximum number of units that can be returned |
Actions available
For each product you can:
- Select product by checking the box.
- Define the amount to be returned (maximum: quantity available)
- Choose the action to be taken:
- Inventory ReceiptThe product is returned to the warehouse inventory.
- Change: A replacement product will be sent to the customer.
- ReasonOptional field to document the reason for the return.
Products that have already been returned in previous returns will be disabled (quantity available = 0).
Multiple selection
You can speed up the process by using:
- Select allUse the checkbox in the header to select/deselect all available products.
- A counter of selected products to verify your selection.
Step 2: Select exchange products
This step appears only if the Change action was selected for a product.
Features
- Search for products in the store's inventory.
- Select replacement products.
- Define the quantity to be sent.
Information displayed
| Field | Description |
|---|---|
| Image | Product photo |
| Name | Product name |
| SKU | Reference code |
| Quantity available | Warehouse stock on hand |
| Quantity to be shipped | Units to be included in replacement shipment |
Step 3: Confirmation
The last step displays a complete summary of the return before it is registered.
You will be able to review:
- Returned products
- Quantities
- Selected actions
- Replacement products (if applicable)

ℹ️ Before confirming the return, please carefully review the quantities selected and the action applied to each product to avoid errors in inventory or replacement shipments.
Was this resource helpful to you?